- Get link
- Other Apps
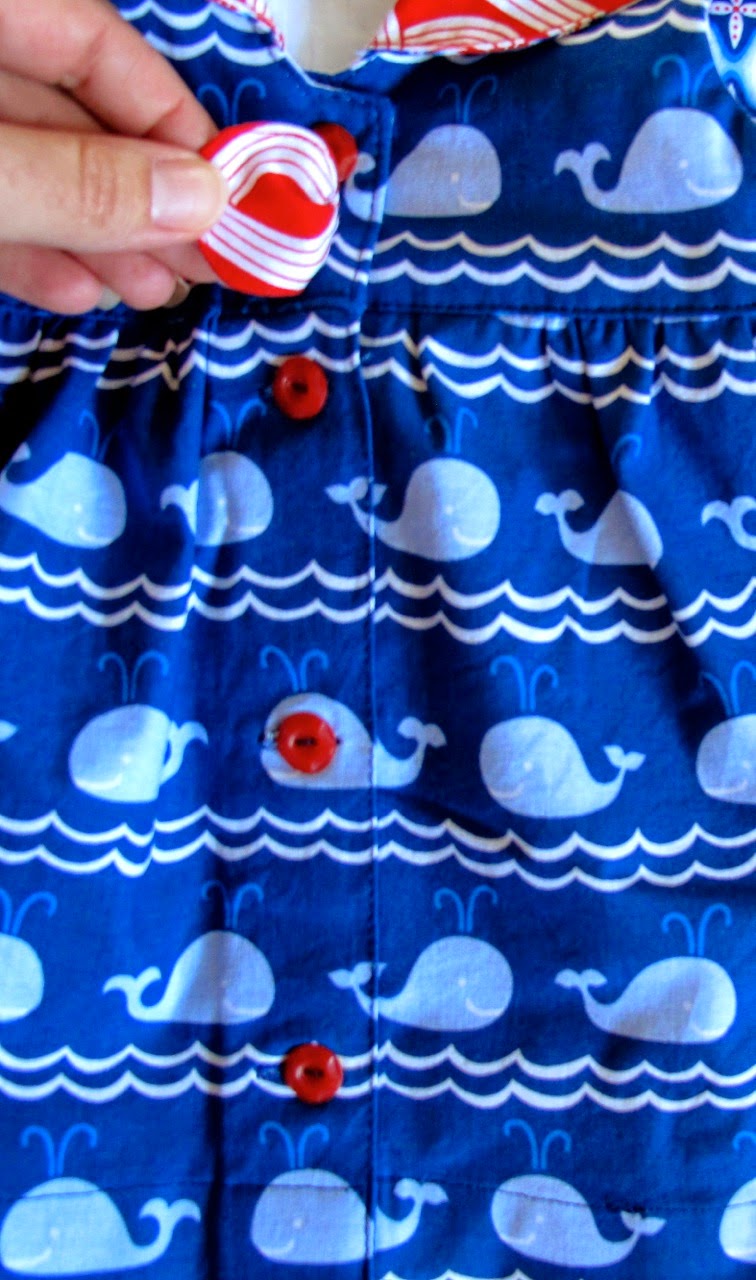
This is the adorable little dress I made from the Seaside Sailor Dress Pattern during the recent Tie Dye Diva patterns sew along! I love how it turned out. So teeny tiny in 0-3 months size.


The fabric I used is from the new True Blue collection
by Ana Davis for Blend Fabrics and was generously provided to me by Blend; all opinions expressed here are my own.

So many adorable nautical options in this collection! It's brand new, but I know that Hawthorne Threads has True Blue in stock at the time of this posting. I had a
hard time choosing which to use because there were so many darling combinations! But the little blue whales called to me for this dress, with the red twist print cut on the crossgrain for the collar and bow, and the "Jack and Jill" tiny medallion for the undercollar.
Planning ahead, I realized I’d need to match the whale print across the button front
of the dress. I had limited fabric to work with and wanted to be sure I did it
right the first time! There’s been some interest in a tutorial for how I did
this, so here goes.
The concept is the same for matching across the bodice and
across the skirt, but the techniques and math are just a little different, so
we’ll do them separately.

Matching Print Across the Button Bodice.
Start by determining the seam allowance and overlap
measurement. For this pattern, the seam allowance is given at 1/2” and the button
extension overlap is
1.25”.

Now, how did I know the overlap was 1.25”? Well, because I
designed the pattern. This is the rare pattern in which I did not mark center
front on the pattern piece. It’s not used during normal construction so I
didn’t mark it but it would have been helpful for this print-matching technique
and I’ll keep that in mind when I’m drafting in the future! You also could have
figured this out from the instructions for folding and pressing the 1.25”
overlap on the skirt portion. So, for the Seaside Sailor for Baby pattern, my seam
allowance plus overlap is ½” plus 1.25” = 1.75”. We'll be using that number later.
(If you are matching a back overlap, for example on the back bodice of the
Perfect Party Dress pattern, Fair & Square pattern or La Tulipe dress pattern, the seam allowance is 1/2" and the overlap is 1”
and both those measurements are stated in the instructions for those patterns.)
I first cut my wearer’s right bodice, the ‘overlapping’
piece, as usual, then pressed under the ½” seam allowance on the center edge.
Then I placed this on my uncut fabric leaving at least 1.75” extending under the cut bodice piece, until the print matched
exactly.
 |
| Look carefully! You'll see the bodice outline and the folded-under edge. |
Then I marked the center match-up line on the uncut fabric, right along the folded edge.

Leaving the right bodice in place, I turned the pattern piece over (because it’s cut in reverse, right?) folded
under 1.75" for both the seam allowance and button extension and butted the fold right up
to the right bodice piece, aligning the bottom edges.

I carefully held (should have pinned) the
pattern piece in place, removed the cut bodice I was using as a guideline, and
unfolded the folded-under portion of the pattern piece. Now
my left bodice was in perfect position for cutting, and I cut around it.

Finished bodice, nicely matched!

Matching print across the Skirt portion.
The print-matching method is really the same as used for matching up the bodice, with just a few adjustments because we have a pressed-over edge instead of a seam allowance, and because the skirt portion of this dress is cut from
measurements and not a pattern piece.
For the skirt print matching, we first determine the total of
the pressed-under button extension plus the overlap. Each side of the skirt is pressed
under 1” then again 1.25”. Then, same as for
the bodice, the pieces overlap 1.25”. So
the total of extension allowance and overlap is 1” + 1.25” plus 1.25” = 3.5”. Then, by trial and error, I learned to add
an additional 1/8” for ‘turn of cloth’ used up on the two folded edges of this midweight cotton quilting fabric. So the
total is 3-5/8”.
I cut the skirt portion the length specified, but several
inches wider than given in the pattern, to allow for matching of the
print. I then pressed the wearer’s right
edge of the skirt under 1”, then again 1.25” as stated in the pattern, and
placed it overlapping the left edge of my skirt fabric, leaving at least 3-5/8” extending
under the right edge, until the print matched up.

I marked the match-up line.

I then lifted the right edge of the skirt and measured out 3-5/8” from the match-up line and marked the cutting line.

If you were daring, you could cut
your fabric on the cutting line and it might match up pretty well. But,
let’s test it out first before we cut. (can you hear your grandmother saying
“Measure twice, cut once”?) To test it out, instead of cutting on the cutting line, fold
on the line and press. This first fold is
the new pretend ‘edge of your fabric’. Fold it over 1”, then 1.25” per the
instructions. Your folded edge should be aligned with the match-up line. Is it?
If so, unfold, cut off the fabric on your cutting line and continue
with the pattern.
Troubleshooting: If your fold extends past the match-up line, you need to cut
off less fabric, so move your cutting line further toward the raw edge
of the fabric and re-press and re-fold to check it. If your fold does not reach
the match-up line, you need to cut off more fabric. Move your cutting
line toward center front and check again.
Here is the finished bodice joined to the skirt - print-matching perfection!

Comments